
In part 1 we looked at a two-step strategy for blending, but now we need to consider how we teach this to our learners.
For our learners with additional or special educational needs, the usual pathway may not be sufficient for success, and we may need to use a structured approach to gradually working towards independent blending.
This graduated approach to learning to blend offers support and scaffolding that leads the child to independence at a pace that matches their individual profile of needs. This will involve using our professional judgement to offer lots of blending practice using some or all these teaching strategies.
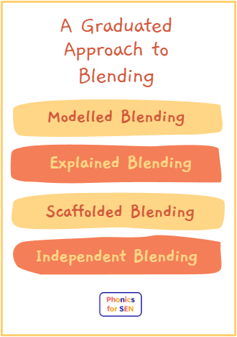
Modelled Blending – I do
Many children with additional or special educational needs benefit from having the opportunity to observe and listen to the teacher or TA modelling a good blending technique, showing them what blending looks like and sounds like. It is important that the sounds are well articulated by the adult as the child will copy and learn that way of saying the sounds. Belt and braces – make sure sounds are ‘tidy’, e.g. /n/ is “nnn” not “nuh”, /b/ is “b” not “buh” etc.
Step 1 of our blending strategy is straightforward, but care needs to be taken with step 2, connected phonation. This involves the teacher or TA pointing and moving their finger under the word whilst actively vocalising the process of connected phonation. They must make sure that there is a good correspondence between the sound they are saying at any given time and the position of their finger in relation to the matching grapheme within the word. Then they must show how they are listening for the word forming before concluding what the word is. Some of our learners with complex needs may need lots of experience of this.
Explained Blending – I do
If we think about our phonics practice, do we at any point actually explain to our learners how we decode words? Do we tell them how we read written words, or do we assume they get that this is what these lessons are all about? Many, of course, will work this out but our learners with additional or special educational needs may benefit from having this explicitly explained. It is quite easy to do by simply carrying out modelled blending but also commenting on each part of the process, saying what it is you are doing. Once again, step 1 is straightforward but let’s look at step 2 for our mop friend again.

“I look at the first letter (grapheme) and say what sound it is… /m/.”
“I keep saying this sound as I look at the next letter and say that sound. /m/>/o/. The sounds get pushed together.”

“I keep saying this sound as I look at the next letter and say that sound. /o/>/p/. The sounds get pushed together.”
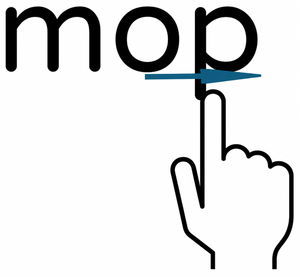
“I don’t stop until I have worked through the whole word.”
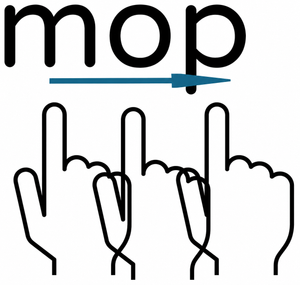
“I am pushing the sounds together as I move through the word and I listen for what word is being made – mop.”
When explaining in this way use language that is appropriate for your learners.
Some of our learners with complex needs may need lots of experience of this.
Scaffolded Blending – We do
- A Place to Read
The first of the scaffolded activities is an intermediate strategy that enables the learner to experience part of the blending process with heavily scaffolded support. This bridge to blending is an activity called ‘A Place to Read’.
a. Thechild is shown a card with large dots on that each represent the position of a sound in a spoken word e.g. for a VC word there will be two dots and for a CVC word there will be three. To work on a particular word, a picture card that represents it is placed face down next to the dots. Let’s use the word ‘mop’ as an example again.

b. Then the teacher or TA carries out step 1 of the blending strategy (segmented phonation) and says each sound separately as they point to the corresponding dot.
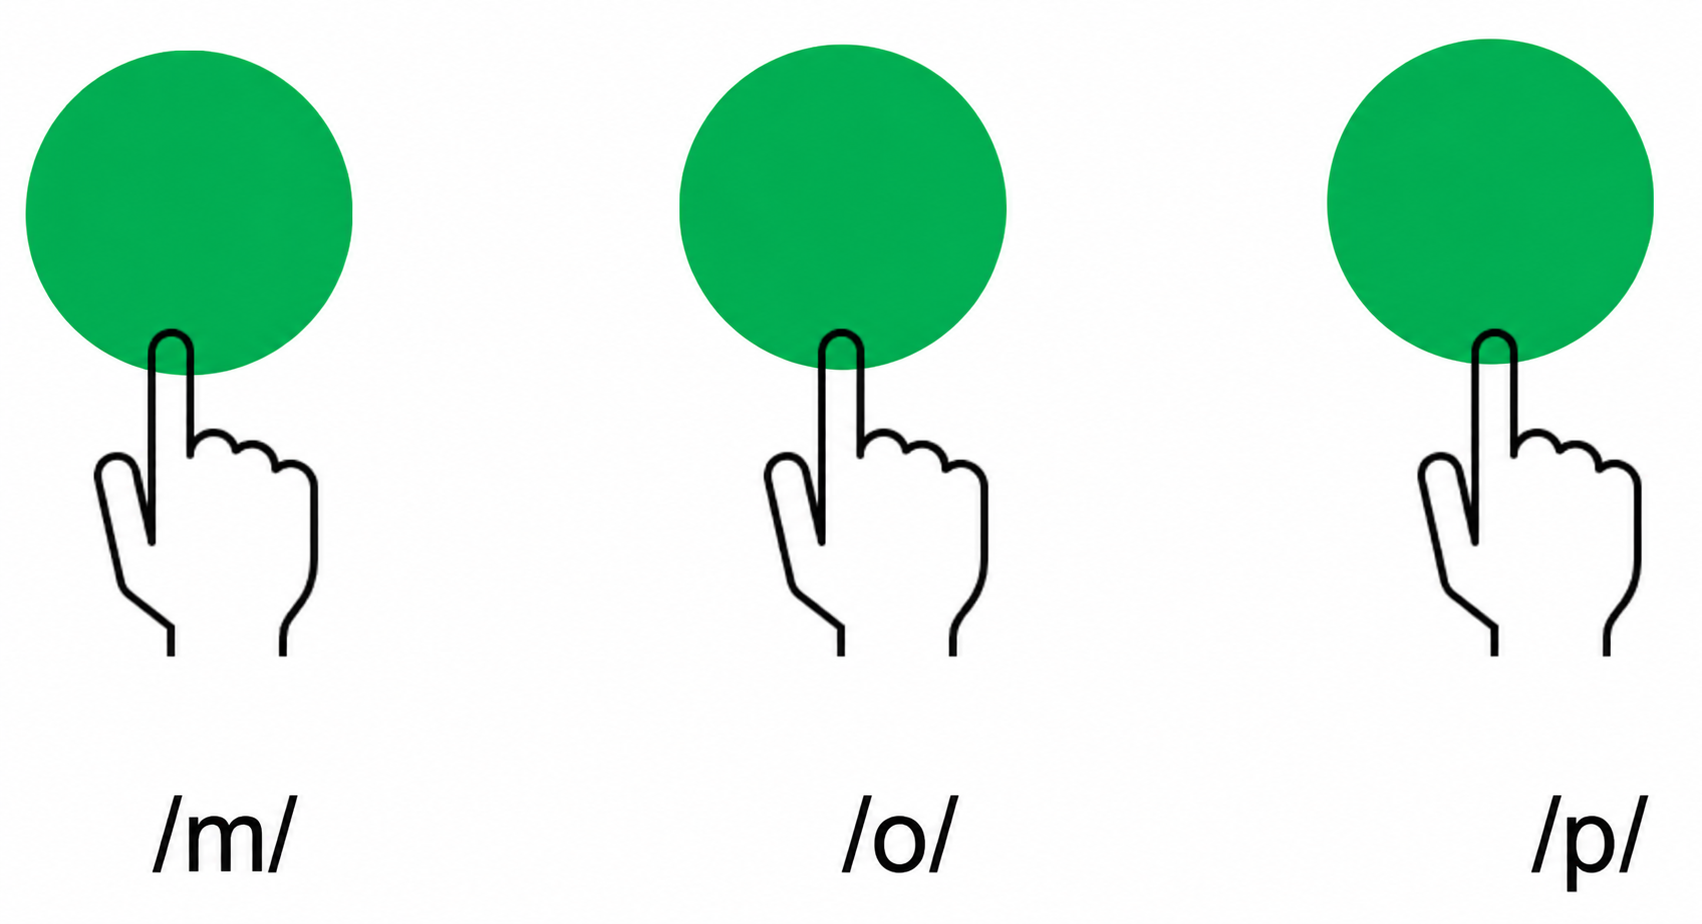
c. Next, the teacher or TA says the sounds in the word using the connected phonation technique. The teacher or TA must make sure that they point to the dots as they track their finger left to right such that it corresponds to the dot that represents the sound that they are saying at any given time.

“mmmmooooooop”
d) The child is asked to listen and say what word they have heard forming. They can then turn over the picture card to see if they are right.
In this way the teacher or TA does the heavy lifting for the child who experiences one part of the blending process and becomes accustomed to listening for words.
2) Tandem Blending – Adult led
The next scaffolded strategy moves the pupil from experiencing part of the process to fully participating in the blending process.
At this point the learner reads a word by blending the sounds ‘in tandem’ with the teacher or TA who takes the lead. Both the child and adult will go through the blending steps, speaking at exactly the same time. This gives the child confidence as well as support for identifying the sounds and hearing them accurately, with the child expected to work out what the word is.
3) Tandem Blending – Pupil led
The next scaffolded strategy is carried out in a similar way to that described above, but this time the teacher or TA hangs back a little and waits for the child to take the lead.
The lag between child and adult should be minimal so that they are both working on the same given sound. This time the child will be first to identify the sounds, and they process their own voice blending them.
This approach moves the child towards taking more responsibility for their blending.
Independent Blending
The final phase is of course the pupil independently blending to read a word. The teacher or TA should continue to encourage them to point to the graphemes as they blend and work through the word.
The teacher or TA is there to closely watch and listen to the child and can step in and give support if needed. This may be support with blending itself (perhaps calling up one of the previously used scaffolded strategies) or identifying when the child makes an error, applying appropriate correction techniques.
Blending Troubleshooter
To make things easier for you, this handy table below helps you to work out what to do when a learner has a problem with various aspects of blending.
Blending Troubleshooter
To make things easier for you, this handy table below helps you to work out what to do when a learner has a problem with various aspects of blending.
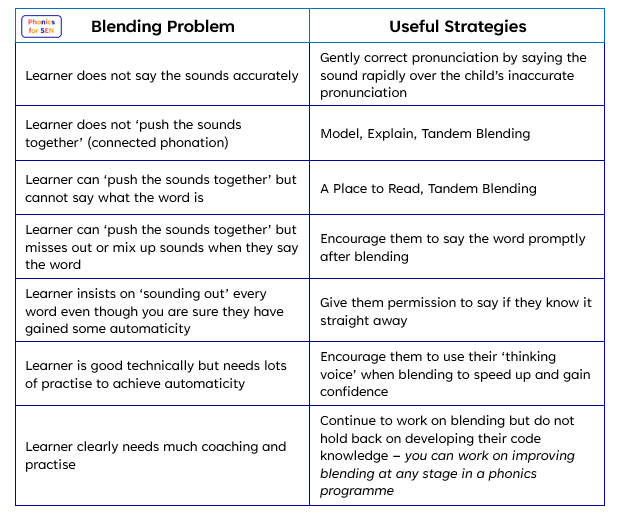
So, let’s put together what we know from parts 1 and 2 of this blog and come up with a plan for teaching blending to those learners who are finding it difficult:
- Teach blending as a two-step process that includes segmented and connected phonation.
- Use a graduated approach to teaching blending that includes a range of strategies to use with an individual learner, as appropriate.
Footnote: This work was shared with the DfE and incorporated into their ‘Reading Ambition for All’ training delivered by the English Hubs.